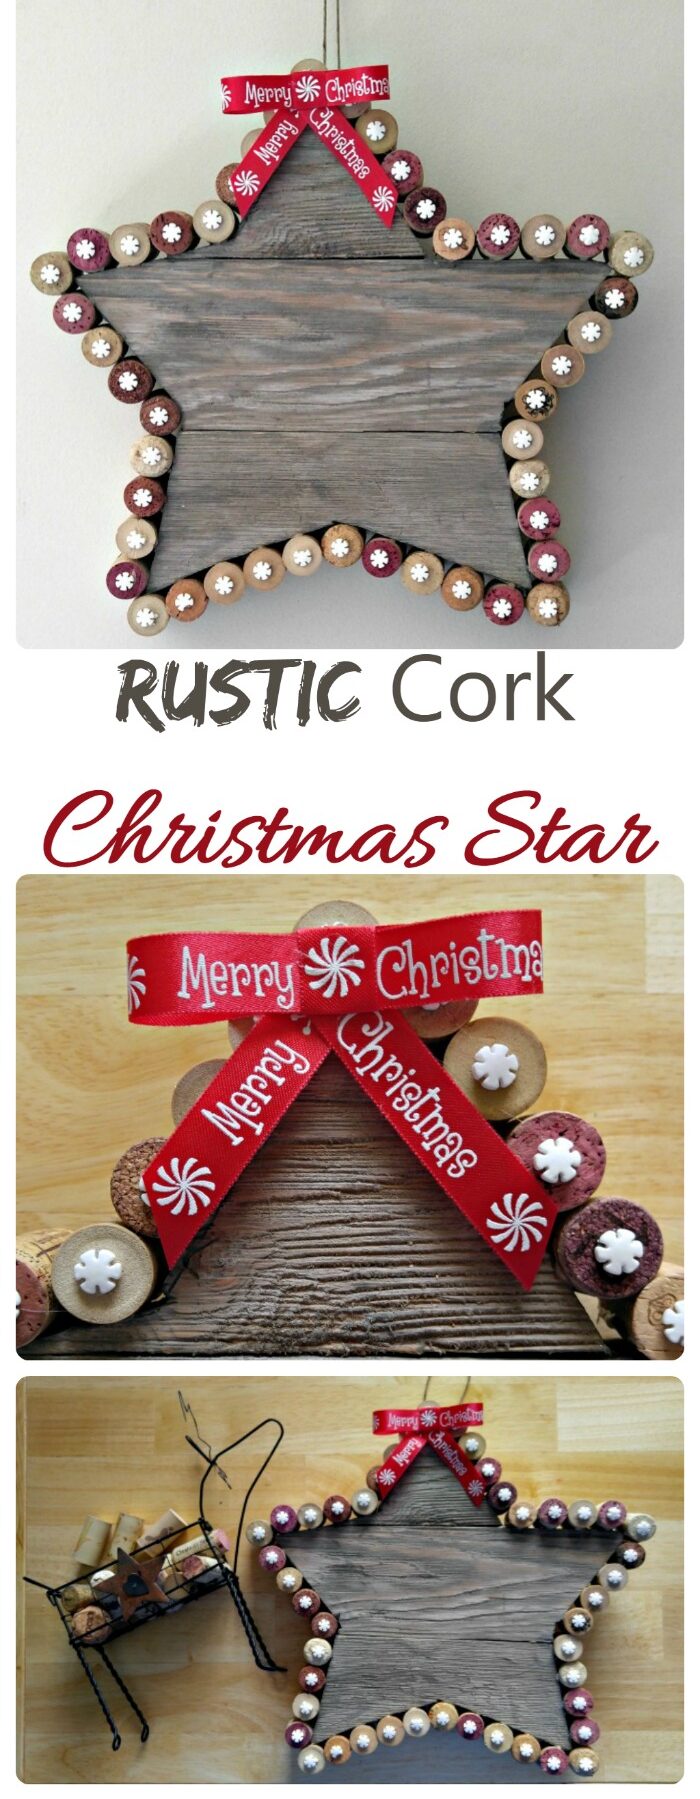
I love the way this cork Christmas star turned out! Stars are symbolic of Christmas, whether they’re atop a tree, or hanging as Christmas decor.
My kitchen pantry has recently been renovated and we added a rustic barn door to it. As usual, there is a lot of left over wood for me to reclaim for decorative projects.
Today’s project makes use of the off cuts of light gray wood from the barn door project.
Are you as much into Christmas decorating as I am? Check out my recent post featuring the Incredible Christmas Place.
Wine cork projects are so much fun to do. Do you enjoy them, too? See this cute wine cork pumpkin project for more seasonal fun.
If you have little kids hoping to be on Santa’s nice list make sure you check out our posts with Santa’s address and Santa’s phone number, so they can get their lists to him in time for him to leave presents in their stockings!
As I was wandering around the store looking for stocking stuffers, I came across this star made with corks.
I laughed when I looked at it, since it looked as though it was made by a five year old and was actually for sale.
However, I knew what my reclaimed wood would turn into next!
Note: Hot glue guns, and heated glue can burn. Please use extreme caution when using a hot glue gun. Learn to use your tool properly before you start any project.
It’s time to make a cork Christmas star
Since my husband and I are lovers of wine, I had lots of corks to use in my rustic cork Christmas star.
If you still have extra corks after making this project, don’t throw them away. Embrace being eco-friendly by finding locations to recycle your wine corks.

(This post has affiliate links for your crafting experience.) To make the project you will need the following supplies:
- 1 star shaped wood form about 8″ in size (You can buy one or make one as I did below)
- 2″ x 1/4″ plywood backing piece
- 45 Corks
- Red and white “Merry Christmas” ribbon – 1/2″
- Glue gun and hot glue sticks
- Wilton snowflake mix sprinkles
- Jute to hang the star
- Screws
- Saw and hammer
We started the project by placing our wood pieces side by side and using this star pattern to trace an 8″ star onto the wood.

Once the pattern was drawn, we doubled the wood pieces (ours were only 5/8″ thick and I wanted my star to be double this thickness to accommodate the size of the corks).
Then my husband cut out the star shape and added a piece of plywood to the back to secure them into a star shape.
Next, I got to work attaching the corks.
I just added a strip of hot glue on the back of each cork, trying to keep the name or design on the cork on the outside if there was one.
My rustic cork Christmas star is all ready to add some decorations!

Since these corks were ones that we had saved from actual bottles of wine, they all had a corkscrew hole in the top of them that looked unsightly.
What to cover them with? These Wilton snowflake sprinkle mix were just the thing!

Once all the snowflakes were added, the cork Christmas star was almost done.
All that was needed now was a Merry Christmas bow on the top of the star and a piece of jute to use as a hanger on the back.
Tada! All done and ready to display. I like mine so much more than the one I used for inspiration for the cork Christmas star, don’t you?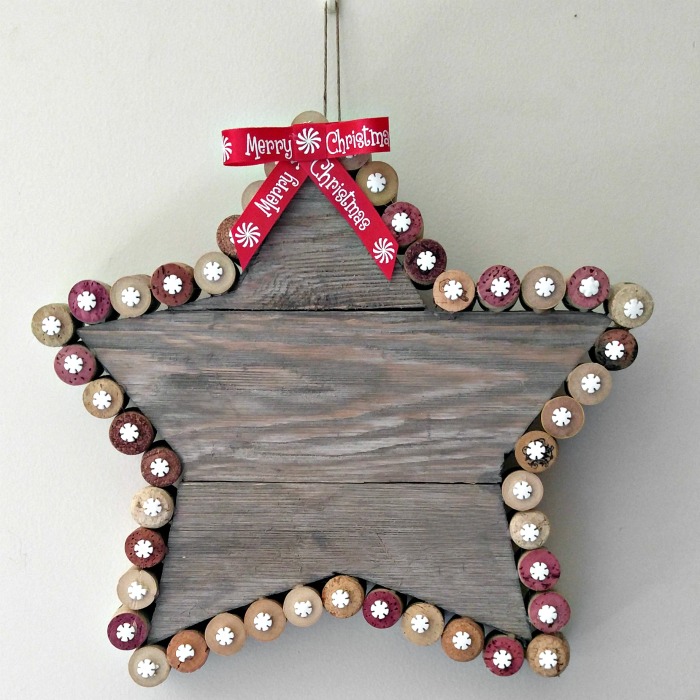
My rustic cork Christmas star looks right at home on my picture wall in the den.
You could also display this cork star on a Christmas table nestled in between two poinsettia plants. It would celebrate both Christmas and National Poinsettia Day!
Have you used corks in decorating projects? What did you do with them? I’d love to hear about your project in the comments below!
For more Christmas inspiration, see my It’s Christmas Time board on Pinterest.