This adorable DIY straw hat scarecrow door decoration will usher in the fall and delight your family and neighbors.
This project uses fall-themed elements, to make a front door wreath that will be festive all season long.
There’s so many opportunities for crafting and decorating over these next few months. Hanging a fall or Halloween wreath to decorate your front door is the perfect way to greet guests!
This is an easy and inexpensive craft that probably uses items you already have at home! Keep reading to learn how to make this straw hat scarecrow wreath DIY project.

Supplies for this scarecrow straw hat door decoration
The inspiration for this adorable scarecrow hat DIY project came from one that I saw years ago in a neat shop on Etsy called Ritzy Wreaths and from the desire to repurpose a worn out old gardening hat.

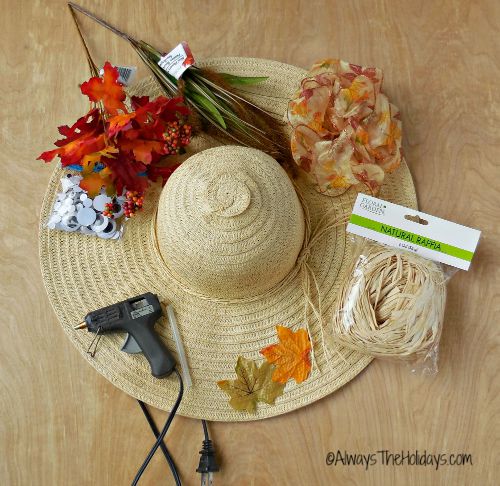
To make this straw hat scarecrow hat wreath, assemble the supplies listed below. You can find them on Amazon, but check your local Dollar Store too; it’s my favorite go to place for craft supplies.
Some of the links below are affiliate links. I earn a small commission, at no extra cost to you if you purchase through an affiliate link.
- One floppy straw hat with a wide brim (be sure to get one with a floppy brim – you’ll be folding it and you don’t want it to be too stiff)
- ½ package of natural raffia
- Autumn floral picks (I used leaves with berries and cattails for mine)
- 2 large wiggle eyes
- Long piece of black felt
- 4 silk autumn leaves
- 1 roll of 1 ½” wide wire wrapped ribbon
- Hot glue gun
- 2 hot glue sticks
- Wreath hanger

DIY straw hat scarecrow wreath tutorial
Note: Hot glue guns, and heated glue can burn. Please use extreme caution when using a hot glue gun. Learn to use your tool properly before you start any project.
Take out about ½ of the package of natural raffia and find the center of it. Wrap it with a single piece of the raffia and hot glue the ends to keep it together.
Then hot glue the raffia to the middle of the space above the hat’s dome, making sure half of the raffia falls on each side of the hat’s dome, to resemble the scarecrow’s hair.
 Fold over the brim of the hat towards the raffia, and hot glue it in place securely.
Next, take your floral picks and separate them from the end so that you have individual pieces of greenery. I used a pair of wire cutters to snip them to the lengths I wanted.
On the top of the folded over brim area, start poking the floral picks through the brim, horizontally. You can arrange them in whatever way you like.
Then insert a sprig of leaves straight through the center into the back area of the hat and secure by twisting the stems.
You won’t need to secure the other floral picks. Just leave plenty of stem on them and they will stay put.
I’ve included a photo of my design below, so you can copy it or take your own creative liberties with your straw hat decorations.
 Now comes the fun part – making the face for the DIY scarecrow wreath. I hot glued some of the berries from one of the picks to the middle of the top of the hat’s dome for the nose.
Then added two dabs of hot glue under the wiggle eyes and positioned them above the nose.
Next, take your black felt and cut it into a smile shape, or a frown, or a scowl, depending on how you want this scarecrow hat DIY project to appear.
I wanted Mr. Scarecrow to be happy so I made a smile. Use a stripe of hot glue to paste the mouth in place.
 The next step is to arrange the raffia hair the way you want it. Mine was very curly from being in the package, so I pulled on it to make it a little straighter.
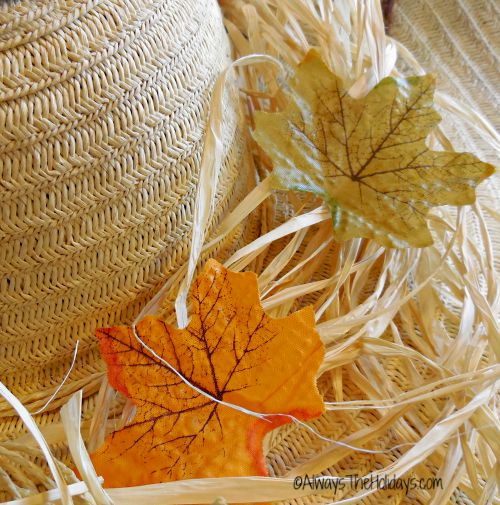
Then hot glue four silk autumn leaves so that they look as though they are falling from the trees onto the scarecrow straw hat. Gluing these leaves also helps to hold the raffia in place.
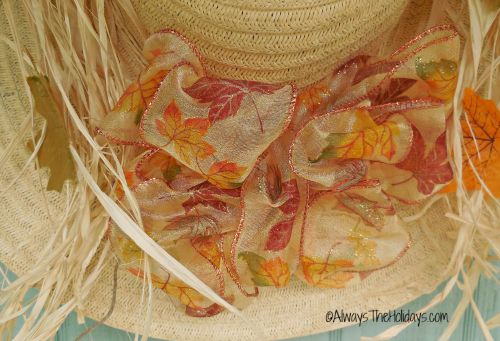
 The last step for making this scarecrow hat DIY project is to make him a bow tie. I made him a huge floral bow, as a bowtie. You can see the floral bow tutorial here.
My hat has a tie around the brim, so I just slipped the ends of my bow under it and tied a knot. If yours doesn’t, you will need some more hot glue to position the bow tie in place. That’s it. Drum roll please…………………meet Mr. Scarecrow! He’s such a happy looking scarecrow door decoration!
Display it on your door by hanging it on a wreath hanger.
 I made this scarecrow straw hat wreath idea in about an hour. I had most of the supplies on hand and only had to buy a package of raffia, some floral picks, and a big package of wiggle eyes from the Dollar Store.
Do you decorate for fall? What sort of projects do you like to have around your house. I would love to hear in the comments below.
More fall activities
If you’re looking for some more seasonal fun, make sure to check out these free printables:
- Fall printables (word search, word scramble, crossword, scavenger hunt and coloring pages)
- Halloween printables (word search, word scramble, crossword, scavenger hunt and coloring pages)
- Thanksgiving printables (word search, word scramble, crossword, and scavenger hunt)
Share this post with a scarecrow door decoration on X
Have you enjoyed learning how to make a scarecrow wreath? Let your friends and family know about it by sharing this post:
Want to make a cute autumn door decoration? Head to Always the Holidays for a tutorial to make a DIY scarecrow straw hat decoration. 🍂🎃🍁 #StrawHatScarecrow #ScarecrowStrawHat #ScarecrowWreath Share on XPin this straw hat scarecrow wreath tutorial for later
Would you like a reminder of this post with straw hat scarecrow wreath? Just pin the image below to one of your Halloween boards on Pinterest so you can easily find it later.

Straw Hat Scarecrow Wreath Tutorial - Autumn Door Decoration

Looking for ideas for cute autumn door decorations? Then this scarecrow straw hat wreath DIY project is for you!
It's a easy scarecrow hat wreath only needs 5 supplies, and can be made in 30 minutes!
Materials
- One floppy straw hat with a wide brim
- ½ package of natural raffia
- Autumn floral picks (I used leaves with berries and cattails)
- 2 large wiggle eyes
- Long piece of black felt
- 4 silk autumn leaves
- 1 roll of 1 ½" wide wire wrapped ribbon
- Wreath hanger
Tools
- Hot glue gun
- 2 hot glue sticks
Instructions
- Take out about ½ of the package of natural raffia and find the center of it. Wrap the center with a single piece of the raffia, and hot glue the ends together.
- Hot glue the raffia to the middle of the space above the hat's dome, making sure half of the raffia falls on each side of the hat's dome, to resemble the scarecrow's hair.
- Fold over the brim of the hat towards the raffia, and hot glue it in place.
- Snip the floral picks so you have each piece of greenery as an individual pick.
- Start poking the floral picks horizontally through the folded brim.
- Insert a sprig of leaves straight through the center into the back area of the hat and secure by twisting the stems.
- Glue some berries from one of the floral picks to the middle of the hat's dome for the scarecrow's nose.
- Glue the wiggle eyes to the hat's dome above the nose to make the scarecrow's eyes.
- Cut the black felt into a smile and glue it to the hat's dome below the nose to make the scarecrow's mouth.
- Arrange the raffia hair so it's positioned the way you like, then glue four silk leaves to look as if they've fallen onto the straw hat scarecrow wreath.
- Make a floral bowtie using this floral bow tutorial.
- Glue the bow tie under the hat's dome.
- Display the finished scarecrow straw hat wreath on your door with a wreath hanger!
Notes
Make sure to use a straw hat with a floppy brim for this project. You'll be folding it and you don't want it to be too stiff.
Recommended Products
As an Amazon Associate and member of other affiliate programs, I earn from qualifying purchases.


10 Festive Fall Door Decorations | Ridergal.com
Monday 7th of November 2016
[…] Always the Holidays […]
6 Ways to Decorate for Fall Now That Halloween is Over | Fin-Future
Monday 7th of November 2016
[…] Image via Always The Holidays […]
10 Festive Fall Door Decorations That Arent Wreaths | Celebrities
Tuesday 18th of October 2016
[…] Always the Holidays […]
Peggy Cobb
Sunday 4th of September 2016
This is such a cute idea. I just might try to make one.....I'm not a crafty person but I think I could do this.
Carol
Sunday 4th of September 2016
Thanks Peggy. It really was easy to put together. I love the way it looks on my door! Carol