Fall is here, which means it’s pumpkin season! If you want to try your hand at a fall themed project, try making these adorable mini pumpkin planters for succulents.
While carved pumpkins are a lot of fun at Halloween time, carving them opens the pumpkin up and this leads to rotting. This DIY fall decor projects uses faux mini pumpkins to combat that problem!
Succulents are a great choice for this project because they are easy to grow, perfect for a beginning gardener and so pretty to look at. These mini pumpkin planters are a perfect way to display your succulents during the fall.
Keep reading to learn how to make these succulent planters.

Note: Hot glue guns, and heated glue can burn. Please use extreme caution when using a hot glue gun. Learn to use your tool properly before you start any project.
Making these mini pumpkin planters
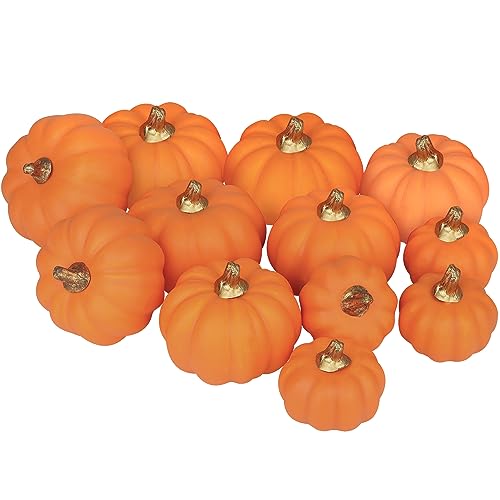
For today’s project, I am going to use small mini pumpkins that are make of foam with a plastic coating on the outside. To make this project, you’ll need just a few supplies:
- Miniature foam pumpkins
- One succulent plant for each pumpkin planter
- Green moss
- Succulent/cacti soil
- Sharp knife
- Spoon or melon baller
- Hot glue gun and glue stick
Mini pumpkins come in all sorts of shapes and sizes, as well as many colors. Use a variety for the best effect.
Making the opening for the succulent planters
Use a sharp knife to cut off the top of the pumpkins. The inside consists of foam which is a bit tough to remove. I used both a melon baller and a sturdy spoon.
Try to leave at least a ¼-⅜” wall on the outside. My pumpkins had a metal piece on the inside of them that I also removed.
You will be using one succulent for each planter that you make. Try to choose a size that relates to the size of the pumpkin opening. Most garden centers and big box stores sell succulents.

They are also very easy to grow from leaves if you have a friend who grows them. Each leaf will eventually make a little baby plant. It’s a great way to get plants for free!

Fill the opening in the mini pumpkin planter with soil. I used a cacti/succulent soil since it drains well. 
Covering up with top edge
You will notice that the top cut edge shows the foam inner layer, even when you have soil in the planter. Now is the time to use the glue gun.
Attach a few pieces of foam around the opening of the mini planter with some hot glue. This covers the white part well so that it can’t be seen.
Time to plant the succulent in the mini pumpkin planter
Now for the best part. Take one of your little succulent plants. If the roots are too big, you can trim them a little to fit into your opening. Place the roots of the plant into the soil.

TADA! They look so cute as a group!
Let’s make some pumpkin vignettes
You can, of course, just display these planters anywhere you normally put plants, but they can also be combined into a fun fall vignette.
Arrange some moss along with some silk autumn leaves on a long white tray and arrange the planters. 
For even more interest, stack some old books and a fun clay pot candy dish behind the tray for a wonderful look. Isn’t it perfect for National Pumpkin Day?
Another fun way to display the group of planters is by using a small brown wooden serving tray with rope handles (I got mine at Michael’s Craft Store).
I have done a variation of this pumpkin project in larger form on my gardening site by using real pumpkins and making succulent arrangements on top of the pumpkins. You can check it out if you have more succulents to plant!
Share this post about DIY small planters for succulents on X
Have you enjoyed learning this succulents fall decor idea? Let your friends and family know about it by sharing this post:
Make a set of mini succulent planters using faux pumpkins! Get the tutorial on Always the Holidays. 🪴 #SucculentPlanters #FallSucculentPlanter Share on XPin these mini pumpkin planters with succulents for later
Would you like a reminder of these mini pumpkin planters for succulents? Just pin this image to one of your gardening boards on Pinterest so that you can easily find it later.
This video shows just how easy these small planters are to make.
Mini Pumpkin Planters for Succulents - Fall Decor Idea
These miniature pumpkin planters are fun to make and look great when you plant them with succulents. They are ready in just minutes.
Materials
- Miniature foam pumpkins
- One succulent plant for each pumpkin planter
- Green moss
- Cactus or succulent soil
To display
- Wooden box or tray to display the planters
- Green moss
- Silk autumn leaves
Tools
- Sharp knife
- Spoon
- Glue gun and hot glue stick
Instructions
- Use the sharp knife to cut off the top of the pumpkin.
- Hollow out the inside of the pumpkin by removing foam but leave at least a ¼-⅜" wall.
- Heat the glue gun and hot glue the moss around the white foam opening to hide it.
- Add cactus/succulent soil to the opening.
- Plant one succulent in each planter.
- Arrange some more moss and silk leaves on a long tray, or inside a wooden box. This will hold any water which might escape.
- Display with pride.
Notes
The outside of the planters are quite waterproof but will eventually break down and allow moisture to leak out. Take care on furniture.
Recommended Products
As an Amazon Associate and member of other affiliate programs, I earn from qualifying purchases.