Did you know that the second Saturday in December is one of this month’s food holidays known as National Gingerbread House Day? Let’s celebrate by following this gingerbread house tutorial. Making gingerbread houses has always been one of my favorite Christmas memories.
My daughter and I would make one each year, and it was always one of the highlights of the Christmas season.
It was one of the traditions we would do together each year, along with writing letters to Santa’s address. Did you know you can call Santa’s phone number to tell him your wish list, too?
The history of gingerbread is fascinating to read. From learning about the gingerbread capital of the world to discovering why we celebrate with gingerbread, it explains why so many of our traditions came to be.
What a month this has been! Did you know that there are over 150 national days in December to celebrate?

There are almost 2000 national days in the year. This is just one of them. Find out more about national days here.
Jess is grown now, but returns for Christmas, and I love to have one on display when she comes home. This gingerbread house tutorial is easy to follow and is the perfect way to celebrate this national day.
National Gingerbread House Day is not the only gingerbread day to celebrate each year. There is also National Gingerbread Cookie Day and National Gingerbread Day.
Time for some festive fun with this gingerbread house tutorial
We have a fondness for candy-themed gingerbread houses. There are so many ways to put the candy to work so that it decorates both the house and the surrounding display area.
A gingerbread house makes a great table centerpiece, too. We USED to display it on an end table in the den. That is, until our German Shepherd Rusty decided that HE really liked the taste of homemade gingerbread house dough one year.
Now, the house goes in the middle of the dining room table. Just in case. Although he has also been known to steal an entire pork roast from the back corner of my kitchen counter.
Darn dog….a long nose and tall legs will get you a snack anytime!
Start by assembling your supplies. I used my recipe for royal icing. You can find the recipe here.
The recipe uses just three ingredients, and the egg whites make the consistency perfect to keep the pieces of the house together well.
The other pieces were supplies from an old gingerbread house kit, some baked gingerbread, and lots of candy. I place the candy in a muffin tin to have it all handy once the decorating starts.
You will need these pieces of gingerbread featured below. Bake them the day before you build, to allow them to harden well. You can make the icing the day you build the house.
A gingerbread house takes quite a long time to put together, so doing both in one day might stretch time a bit. I made mine over of two days, and it took about 5 hours plus the baking time.
These are the pieces you will need, showing sizes.

I have an area of my craft drawer that holds various candies for craft projects. One of my favorite parts of doing a gingerbread house is seeing what you have on hand and making it do for the decorations.
In my case, it was the following items:
- small candy canes
- bite-sized “Rips” strawberry and green apple licorice pieces
- Sixlets candy
- mini gumdrops
- red and green holiday M & Ms
- miniature marshmallows
- large marshmallows
- Dollar Store gummy rings in the shape of snowmen, Santa and trees
- 2 Dollar Store jelly candies in Christmas shapes
- stick pretzels
- cake pop sticks
I started by dividing my frosting into two parts. One I kept in a bowl with a damp towel over it (so it would not harden)
The other went into a decorating bag with a writing piping tip.
First, I decorated the door area. I frosted the door area and added small, round gumdrops around the edge of it.
A green jelly sour cut into the shape of a wreath decorated the top of the door, and a thin piece of red sour licorice candy made the handle.
I piped the royal icing around the windows and added more pieces of the sour candy to outline the window and make window boxes.
Small round Sixlets added some “flowers” to the window box, and the top right edges of the front area held two wreaths made of red M & Ms and green licorice sour pieces.
The side pieces were just piped with snow and zig-zag shutters. The porch roof was attached and just frosted white for now. These pieces were left to set for about half an hour.
The next step is what I always consider the hardest – assembling the house. It just always falls over. This time it worked fairly well.
I laid it on the unfrosted back side and attached the two roof pieces to the two sides. All were joined with the royal icing.
Then I inserted a small jar and laid the front piece on top of it and attached it with the royal icing.
Perfect! The jar was just the right height, and it kept the front piece in place while the icing dried for a few hours. (It is lying on its side here.)
When the icing was completely dry, I picked the house up, removed the jar, and it kept together perfectly! I was delighted!
The next step was to pipe the back window of the house and add round candies on the top center area of the roof, and also over the front door porch top.
Next, the whole roof area was frosted with the royal icing, and small “icicles” were made by using the piping tip and more icing.
Red and green M & Ms decorated the whole roof of the house, and then I used the writing tip to pipe “shingles” on the roof parts.
Small white marshmallows made a sort of picket fence all around the base of the house. I also used the piping tip to make icicles on the roof eaves. It’s getting there! I love the way it is coming together.

The medium frosted piece of gingerbread was the hardest part to join. I had intended to use pretzels to hold it up, but ended up using candy canes in the end, and even then, it was quite a feat to get it to stay in one place.
This piece forms a sort of lean-to. I also attached some peppermint sticks to the front edges to match the lean-to.
Cut little jelly ornaments, trees, and penguins added a festive look to this area and mini gumdrops and icicles decorated the roof area.
Now comes the fun. I used another batch of royal icing to make snow all around the house. More mini marshmallows form a path to the front door and then the whole snow area& used mini marshmallows to form a “hedge.”
Small gumdrops attached to cake pop sticks are the lamp posts. Near the lamp posts go Santa and a Snowman made from jelly ring pops.
And another decorated tree and a larger Santa Claus made from pieces of a jelly pop sucker are added near the front door. What fun this project is!
The back of the house had to have the windows added after it was assembled (so I could lay it on its side to glue it together) So I decorated this part last.
I made a large picture window with another window box and added a larger wreath.
More fun jelly yard decorations and trees were added as well as mini gumdrops on the sides and icicles to the roof area.
The final touches for my gingerbread scene are adding more icicles to the house and lean to, more gummy trees, Santa Claus figures and snowmen, and a dusting of snow from a sugar duster to give the look of fallen snow.
The stage is set! A perfect mini gingerbread scene that is sure to delight both young and old.
The project took a while, but really all that was needed was some patience while things were drying. The actual assembling part was a ton of fun, and I loved each step of it as it all came together.
It truly is so much fun, not knowing how it will all turn out, and then having it be so cute when it is finished.
If you have never made a gingerbread house, be sure to check out my latest article over at the Gardening Cook – 15 tips for making the perfect gingerbread house.
And if you want more inspiration to make one of your own, check out this roundup featuring 17 gingerbread house designs.
Now it’s your turn! Isn’t it time for you to raid your candy drawer, bake some gingerbread, and make some royal icing? These are Christmas memories that will stay with you for a long time!
Would you like a reminder of this gingerbread house tutorial? Just pin this image to one of your Christmas boards on Pinterest.
If you enjoyed this post, be sure to check out my magic reindeer food bags. It’s another fun project to do to bring the magic of Christmas to your children.
Admin note; This post first appeared on the blog in December of 2015. I have updated the post to include new photos, a printable instruction card and a video for you to enjoy.
Gingerbread House Tutorial
This Gingerbread house will have your child dreaming of sugar plum fairies every night until Christmas.
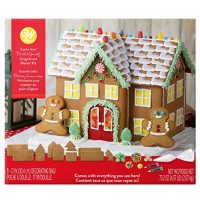
Materials
- Gingerbread House Kit (or make your own Gingerbread and cut it into pieces shown above)
- Royal Icing
- M & Ms
- Gumdrops
- Fruit Jellies
- Christmas figure ring pops in the shape of Santa, elves and trees
- Miniature marshmallows
- Confectioner's Sugar
Tools
- White Foam board to act as a base
Instructions
- If you are making the cake from scratch, you'll need extra time to cut and make the pieces.or you can use a kit.
- Make a royal icing for your house. (get the recipe)
- Use a piece of foam board to act as a base for your house.
- Use the icing to attach the roof pieces to the back side. Allow to set.
- Using icing in an icing bag to pipe doors, and windows. Decorate with Candy.
- Attach the front and sides to the partially set house.
- Add candy canes on the sides of the front.
- Frost the top of the roof to resemble snow.
- Add candies on the roof top and along the top of the roof at the pointed area.
- Diving your royal icing into several bowls and add gel food coloring.
- Add any colored accents that you want on the house.
- Use candies to decorate the peak of the rook, a wreath for the door, a door handle, and path way to the house.
- Use lollipop sticks and gumdrops to make "street lights"
- Ring pop Santa, elf and reindeer make nice yard additions.
- Mini marshmallows can be used to create snowbanks and edges of the lawn..
- Place plain white icing in an icing bag, add a round tip and pipe icicles from the eaves.
- Use candy canes and an extra piece of gingerbread to make a lean to on the side of the house.
- Add more ring top figures, and trees as well as icicles to the lean to.
- Sprinkle with powdered sugar to look like fresh snow.
- Display with pride.
Recommended Products
As an Amazon Associate and member of other affiliate programs, I earn from qualifying purchases.